Vanilla Java: Using Java SE as a Framework

Photo by sheri silver on Unsplash
Table of contents
- 🔄 Hot Reloading a Java SE App
- ♻️ Hot Reloading an HTTP Server
- 🪄 Generating boilerplate code via annotations 🧚
- ✅ Testing with JUnit
- 🧰 Building Java with Java
- 🟢 Closing thoughts
The Java Language Specification specifies in minute detail the grammar and semantics of the Java Programming Language. It also includes platform features like the loading of classes and interfaces, service provisioning and annotations that can provide runtime and compile-time information for meta-programming.
With all these features, I think it’s fair to consider Java Standard Edition, or Java SE, as a framework in its own right.
It is not to be confused with Java EE, or Java Enterprise Edition [1] (recently rebranded as Jakarta EE), which adds loads and loads of APIs against which Java programmers can create huge enterprisey things on top of JSPs and Servlets, for example.
Java EE was all the rage in the early 2000’s, but these days you’re more likely to find Java software based on things like Spring and its more streamlined version Spring Boot, or even trendier things like Micronaut and RedHat’s Quarkus (I know it must be very cool because its slogan is SUPERSONIC SUBATOMIC JAVA), both of which promise to make Java more Kubernetes/Cloud/Microservice friendly [2].
What you’re very unlikely to see is Vanilla Java being used in the real world.
By Vanilla Java, I mean just Java SE, without any frameworks, making use of only small libraries, where it makes sense.
The term “Vanilla Java”, as I am using here, was inspired by our JS friends who coined Vanilla JS for the “framework” included in every browser since the 1990’s.
As most people who have had to create complex applications on top of multiple frameworks can attest, frameworks do not bring only upsides. They bring a lot of downsides too.
If you’re unlucky enough to need something fundamental that is not supported by the framework (or even that is just not easily found in the documentation), you may need to employ horrible hacks to get things done. Over the years, the number of hacks might grow so much that you might realize you’ve implemented a second framework on top of your framework to work around its (perceived or real) limitations.
This is the number one cause of big balls of mud appearing in long-lived, not-so-loved code bases, in my opinion.
What if I told you that you can write applications in Java using just the tools the SE platform provides? What if in doing so, you did not significantly increase the amount of boilerplate code you have to write by a significant margin when compared with the size of the application you have to write?

Suddenly, there’s nothing to be worked around. Everything you need, you can go and write or change yourself using the language you know, with the help of whatever library you need (and Java has a library for everything). Searching for information on your “platform” is a breeze.
In this blog post, I want to show you features of Java SE that you may not have realized are available to you as well, not only to framework authors.
I will show you how you can create an application that hot-reloads when you re-compile it (because yes, that has been a feature of Java all along, not of any particular framework, though they would like you to think so). Then, I’ll show how you can create your own annotations and use them to magically generate code to do what you want, so you can still avoid having to write tedious code that sinks productivity. Finally, I will show how you can write and run tests without any framework, using JUnit as a library and CLI.
We will do all this while using no build system at all, just a few helper libraries, because after all, we are not savages: we do want to benefit from the free work of others to get our shit done quickly.
Each section of this blog post will have a link to the relevant branch of the raw-jse repository I’ve created to accompany it. The links look like the one shown below, with a checkered flag representing each checkpoint we’ve accomplished.
Let’s get started.
Hot Reloading a Java SE App
The first thing we need to stay productive while writing a new application is hot-reloading.
If you haven’t had hot-reloading before, you might think this is a minor improvement over whatever your current situation is and as such it’s not a must-have. You would be mistaken.
It’s huge to be able to re-compile your application and immediately see the results in front of you. It’s better than a REPL because it’s your actual code running, not just some snippet you’re playing around with!
To get hot reloading in Java is not hard. You just need to split up your application into a kind of loader application which never changes, and a dynamic part which you can hot swap at will.
To the best of my knowledge, there’s no way to hot swap ALL of your code unless you attach a debugger to it (which allows only very limited hot swapping) or use black magic related to JMX (which I think is what JRebel used to do).
I wrote a blog post years ago about 4 different ways to hot-reload code on the JVM. The method I will show here is fundamentally different, though, as it will work without a debugger, without enabling JMX and is almost certain to work with any Java version, even with Java 16-EA, because we’re only using the SE platform, nothing else.
To demonstrate hot reloading, I’ll create a simple application class that implements Runnable. Every time we
re-compile the application, it will re-run the application class (this re-compilation itself can also be automated
easily via a small bash script or your IDE).
In a real app, this would be something like a HTTP request handler, or Controller as people like to call it,
but to start with, this example should do.
Here’s our super complex first implementation:
public final class Starter implements Runnable {
    @Override
    public void run() {
        System.out.println( "Starter running!" );
    }
}
If we just ran this from main, we couldn’t re-compile it and expect the JVM to let us re-define the class later.
Even if we could do that, we would eventually run into trouble when we kept state somewhere (think of a cache for
example) and then re-defined the classes that state depended upon.
We need to, as I said in the introduction, split up our application classes that we want to be able to reload from the application engine, which will be static.
Let’s call our application engine framework because that’s what it is replacing for us. You may think that writing
our own framework is no better than using an existing framework, but the point is that this is not a generic framework,
it’s a framework we’re writing to do exactly what our particular application needs to do. As you’ll see, it’s going to
stay simple because it has a hugely simpler job than a generic framework that needs to be able to do everything, a
patently impossible goal that we’re staying well clear of.
We should keep the framework classes and the app classes in separate compilation units (or modules).
The framework will need two things, a Main class to bootstrap the app and hot reload it, and a WatchDir class
to monitor the app compilation directory for changes, so it can automatically reload the classes when they change.
The final result should look something like this in your file system:
.
├── app
│   ├── app.iml
│   └── src
│       └── Starter.java
├── framework
│ ├── framework.iml
│ └── src
│     ├── Main.java
│     └── WatchDir.java
└── raw-jse.iml
The .iml files are created by IntelliJ because even though I dislike heavy frameworks, I like IDEs very much.
If you’re curious how to create the above structure in IntelliJ, just create a simple Java project without build tools or
libraries, then do File > New > Module... for app and framework, then create the Java classes.
The WatchDir class uses Java’s FileWatcher as shown in the Oracle Tutorial,
which I basically copied, then simplified to call a lambda a couple of seconds after changes were detected, but only if no
more changes occurred in the previous couple of seconds (so the compiler can keep writing class files and we’ll only load
them once the compiler stops doing work).
This is what Main.java’s main function looks like:
final class Main {
    final AtomicReference<AppRuntime> appRef = new AtomicReference<>();
    final File classPathDir;
    final String appClassName;

    public Main( File classPathDir, String appClassName ) throws IOException {
        this.classPathDir = classPathDir;
        this.appClassName = appClassName;
        System.out.printf( "classpath=%s, runnableClass=%s%n", classPathDir, appClassName );
        loadAndStartApp();
        new WatchDir( classPathDir.toPath(), this::swapApp );
    }

    public static void main( String[] args ) throws IOException {
        if ( args.length != 2 ) {
            System.err.println( "Usage: java Main <classpath-dir> <runnable-class>" );
            System.exit( 1 );
        }
        var classPathDir = new File( args[ 0 ] );
        var appClassName = args[ 1 ];
        new Main( classPathDir, appClassName );
    }

    // more code...
}
As you can see, we take the classpath of the app and its Runnable class as arguments, create a WathDir instance
to watch over the classpath, and let it call this::swapApp when it is re-compiled.
We keep an AtomicReference<AppRuntime> so we always know which app is currently loaded.
AppRuntime is a simple data class:
final class AppRuntime {
    final Class<?> appClass;
    final URLClassLoader loader;

    AppRuntime( Class<?> appClass, URLClassLoader loader ) {
        this.appClass = appClass;
        this.loader = loader;
    }
}
The swapApp method is very simple:
final class Main {
    // omitted code...

    private void swapApp() {
        var app = appRef.get();
        if ( app != null ) {
            try {
                app.loader.close();
            } catch ( IOException e ) {
                e.printStackTrace();
            }
        }
        loadAndStartApp();
    }

    private void loadAndStartApp() {
        loadApp().ifPresent( app -> start( app.appClass ) );
    }

    // more omitted code...
}
The final and most important pieces of the puzzle are the loadApp and start methods.
loadApp creates a URLClassLoader to load application classes and its dependencies, then stores both the
ClassLoader and the application starter class so that we can later start the app, and when swapping it out,
close the previous ClassLoader.
The start method simply instantiates the starter class and then runs it in a new Thread.
final class Main {
    // omitted code...

    private Optional<AppRuntime> loadApp() {
        URLClassLoader appClassLoader;
        try {
            appClassLoader = new URLClassLoader( new URL[]{
                    classPathDir.toURI().toURL()
            }, ClassLoader.getPlatformClassLoader() );
        } catch ( MalformedURLException e ) {
            System.err.println( "Error creating class loader: " + e );
            return Optional.empty();
        }

        try {
            var app = new AppRuntime(
                    Class.forName( appClassName, true, appClassLoader ),
                    appClassLoader );
            appRef.set( app );
            return Optional.of( app );
        } catch ( ClassNotFoundException e ) {
            System.err.println( "Starter not found: " + e );
            return Optional.empty();
        }
    }

    private static void start( Class<?> starterClass ) {
        Object starter;
        try {
            starter = starterClass.getConstructor().newInstance();
        } catch ( Exception e ) {
            throw new RuntimeException( "Unable to start up application", e );
        }

        if ( starter instanceof Runnable ) {
            new Thread( ( Runnable ) starter ).start();
        }
    }
    // omitted code...
}
And this is how you hot-reload code on a running JVM, my friends.
How much simpler can it get?!
Yet, you’ll see framework landing pages declaring proudly how they support hot reloading as if it were some incredible feat.
Well, it might be an incredible feat, but not thanks to them… it’s thanks to the JVM itself.
Next, we’ll take things up a notch and hot-reload a running HTTP server, so that no one can say that this does not work in more complicated settings.
Hot reloading an HTTP Server
To change our hot-reloading app into a HTTP server, the first thing we need is a HTTP library because HTTP is not part of the Java standard library, unfortunately.
We could use a library like Vert.x (high performant asynchronous HTTP implementation) or Jetty, but both of these bring with them a lot more than just HTTP support, which at least I find undesirable [3].
For this reason, I will use a pure HTTP library I wrote myself, RawHTTP, because it is very lightweight (130Kb jar) and exposes nearly everything RFC-7230 describes intuitively.
In a production setting, I would put my HTTP server behind an industry-grade proxy like nginx so that my application doesn’t have to worry about operational things like TLS and rate limits.
As a first-step in changing our current setup to support an HTTP server, we can change the Starter interface from
Runnable to something that takes some input and returns a response, like a Function<String, String>. If we do this,
we’ll give the responsibility of running the HTTP server itself to the framework and it will require no HTTP API
for the app to implement.
This is obviously not going to be enough if we want to be able to inspect HTTP headers, the query string and other HTTP stuff, but it allows us to take a good step in the right direction without introducing a “framework API”.
Before we start coding, though, we need to get our first dependency, the RawHTTP jar.
Managing dependencies
If you want to keep things extremely simple and don’t want to introduce a build tool just for downloading jars, you have a few alternatives.
For example, you could simply visit the online repository you normally get jars from, download the jar and commit it to source control. You can even write a little bash script (or a Java script, as we’ll see later) to automate the process. Sounds crazy, but this is how old timers used to do things back in the day, and it worked just fine.
You could also use the IDE for this. IntellliJ, for example, lets you add dependencies to a module
via the Project Settings screen, as shown in the video below.
It even has an option to download all transititve dependencies, which in some cases may be very helpful as Java libraries tend to have deep dependency trees (and being aware of just how deep it gets is a great thing).
Finally, you could use a plain Gradle script like this, without any plugins (not even Java):
repositories { mavenCentral() }
configurations { runtime }
dependendencies {
    runtime "com.athaydes.rawhttp:rawhttp-core:2.4.1"
}
task copyDependencies(type: Copy) {
    from configurations.runtime
    into file('libs')
}
This has the drawback that now you’ve introduced a large and complex tool to your build, when all you really wanted was to download a couple of jars, but at least that saves you from having to download and manage transitive dependencies manually.
Back to coding the HTTP server
No matter how you got the RawHTTP jar (it’s a single jar, no dependencies), you can now write a class to bootstrap the
HTTP server that takes a Function<String, String> and use that to handle requests.
import rawhttp.core.RawHttp;
import rawhttp.core.body.StringBody;
import rawhttp.core.server.TcpRawHttpServer;

import java.util.Optional;
import java.util.function.Function;

final class HttpServer {
    private final RawHttp http = new RawHttp();
    private final TcpRawHttpServer server;

    HttpServer( int port ) {
        this.server = new TcpRawHttpServer( port );
    }

    void run( Function<String, String> handler ) {
        server.start( ( req ) -> {
            var body = handler.apply( req.getUri().getPath() );
            if ( body == null ) {
                return Optional.empty();
            }
            return Optional.ofNullable( http.parseResponse( "200 OK" )
                    .withBody( new StringBody( body, "text/plain" ) ) );
        } );
    }

    void stop() {
        server.stop();
    }
}
server.start() takes a lambda that needs to handle the request by returning an Optional HTTP response.
If Optional.empty() is returned, the server automatically sends back a 404 response.
We can use this from the Main class, in the framework module, to manage the server.
Only the start method changes from the previous version.
final class Main {
    final HttpServer server = new HttpServer( 8080 );

    /* omitted code */

    private void start( Class<?> starterClass ) {
        Object starter;
        try {
            starter = starterClass.getConstructor().newInstance();
        } catch ( Exception e ) {
            throw new RuntimeException( "Unable to start up application", e );
        }

        Function<String, String> handler;
        if ( starter instanceof Function ) {
            //noinspection unchecked
            handler = ( Function<String, String> ) starter;
        } else {
            System.err.println( "Error: Cannot run application of type " + starter.getClass().getName() );
            handler = ignore -> null;
        }

        new Thread( () -> server.run( handler ) ).start();
    }
}
Also, the application class, Starter, will now implement a Function<String, String> instead of a Runnable.
It takes the path of the request and returns a text/plain response body as a String.
import java.util.function.Function;

public final class Starter implements Function<String, String> {
    @Override
    public String apply( String path ) {
        return "You sent me path " + path + "!\n";
    }
}
Here’s how I compile and run the whole thing:
$ mkdir -p dist/framework
$ javac -cp "framework/libs/*" $(find ./framework -name "*.java") -d dist/framework
$ mkdir -p dist/app
$ javac $(find ./app -name "*.java") -d dist/app

$ java -cp framework/libs/rawhttp-core-2.4.0.jar:dist/framework/ Main dist/app Starter
classpath=dist/app, runnableClass=Starter
Watching directory dist/app
On another shell:
$ curl localhost:8080/hello
You sent me path /hello!
We can now change the app class and hot reload it.
import java.util.function.Function;

public final class Starter implements Function<String, String> {

    @Override
    public String apply( String path ) {
        return "Request path: " + path + "!\n";
    }
}
Re-compile and try again:
$ javac $(find ./app -name "*.java") -d dist/app
$ curl localhost:8080/foo
Request path: /foo!
Just like magic!
By the way, how long do you think it takes for the HTTP server to start accepting connections?
I wrote a script to measure that in a previous blog post… Here’s what it typically prints on my MacBook Air:
% ./measure-startup-time.sh
classpath=dist/app, runnableClass=Starter
Watching directory dist/app
Server connected in 274 ms
Less than a third of a second! Not bad for a VM-based app.
Compiling to a native binary
If we create a non-reflection launcher that we can use when we don’t need hot reloading (i.e. a kind of release mode), then compile our Java app to native with GraalVM, we can get even better startup times.
final class NativeMain {
    public static void main( String[] args ) {
        System.out.println( "Starting server on port 8080" );
        var app = new Starter();
        new HttpServer( 8080 ).run( app );
    }
}
Using this class to bootstrap the HttpServer with the Starter handler, we can then compile to native as shown below.
echo "Compiling framework and app"
mkdir -p dist/native
javac -cp "framework/libs/*" \
    framework/src/{HttpServer.java,NativeMain.java} \
    app/src/Starter.java \
    -d dist/native

echo "Creating native image"
native-image -cp "framework/libs/*:dist/native/" NativeMain
The image has a size of only 9.3MB. How long does it take to start serving requests, you may ask…
$ ./measure-startup-time.sh
Starting server on port 8080
Server connected in 38 ms
This result says it all… an order of magnitude faster.
So, now we have a hot-reloadable app that can also be packaged as a native app, all achieved with nothing but the standard Java SE Platform. No frameworks in sight.
But We can still do better. The current app is not realistic as the HTTP handler is too simplistic… we need more than
a Function to be able to do interesting things (arguably).
In the next section, we’ll see how we can use Java annotations to generate code, allowing us to write basic Java code that maps to request handlers without having to write the boring plumbing to get it done… and still, without using a framework.
Generating boilerplate code via annotations
Java SE has supported annotation processors since Java 1.6 (year 2006!). That’s when there was a Cambrian explosion of annotation-based frameworks in the Java world. Even Spring, which used to recommend XML for configuring applications, released a new version supporting annotation-based configuration a couple of years later, which was revolutionary at the time!
Soon after, JAX-RS came into existence and allowed Java developers to create simple classes that, annotated with a few annotations, could be turned into REST Web Services as if by magic:
package com.sun.jersey.samples.helloworld.resources;

import javax.ws.rs.GET;
import javax.ws.rs.Produces;
import javax.ws.rs.Path;

// The Java class will be hosted at the URI path "/helloworld"
@Path("/helloworld")
public class HelloWorldResource {

    // The Java method will process HTTP GET requests
    @GET
    // The Java method will produce content identified by the MIME Media
    // type "text/plain"
    @Produces("text/plain")
    public String getClichedMessage() {
        // Return some cliched textual content
        return "Hello World";
    }
}
All major Java frameworks support JAX-RS. Unlike Java Servlets, I quite like JAX-RS, but I still don’t want to import a full-blown framework to replace my fights to solve business problems with fights against frameworks and its thousand libraries.
That, however, shouldn’t stop us from writing our own annotations to fit our needs exactly, and still write code similar to the class shown above!
Here’s what I will be aiming for in the first iteration:
package app;

import raw.jse.http.GET;
import raw.jse.http.HttpEndpoint;
import raw.jse.http.POST;

@HttpEndpoint( path = "/" )
public final class MainResource {
    @GET
    public String index() {
        return "Welcome to the main resource.\n";
    }

    @GET( path = "hello" )
    public String hello() {
        return "Hello world!\n";
    }

    @POST
    public String index( String body ) {
        return "Got body: " + body;
    }
}
This is ALL the code my application will have. Once it compiles, this will be turned into a HTTP server that can, of course, be hot-reloaded or compiled to a native binary!
But before we can achieve that, we should first understand the basics of Java annotation processors, which let us do codegen, amongst other things.
Creating a Java annotation
Creating Java annotations is not something you do every day, even if you’re a seasoned Java developer… so, it requires a little explanation.
A Java annotation is nothing more than an interface, with some minor syntax differences. Despite being interfaces, you cannot implement them, it’s the job of the JVM to instantiate them [4], and they may only contain constants.
The @GET annotation (used in the sample code above) might be declared like this, for example:
import java.lang.annotation.*;

@Target( ElementType.METHOD )
@Retention( RetentionPolicy.SOURCE )
public @interface GET {
    String path() default "/";
}
@Target is used to limit what Java AST element types may use this annotation. In the case above, we limit the use of
@GET to only Java methods.
@Retention determines how far the compiler needs to retain information about the annotation. I used SOURCE policy
above because we’ll later write an annotation processor to inspect the source code and generate Java code at
compile-time, so we don’t need that information after compiling the classes.
You could also choose CLASS (the annotation is added to the class file but not loaded at runtime) or RUNTIME
(the annotation is available at runtime) for the retention policy if you wanted to use the annotation for bytecode
analysis or reflection at runtime, respectively.
Creating a Java annotation Processor
Annotations by themselves are normally useless for the program… they may help developers read the code by giving hints
about things (e.g. @Overrides), but without something to interpret them, that’s all they can do.
With an annotation processor, however, they can be used to generate more code!
I will not explain in too much detail how to write one because there are already many resources showing how to do it (this 3-part series by Cloudogu is great, and so is the Baeldung article about it).
For the curious, this is what an annotation processor’s skeleton looks like:
@SupportedAnnotationTypes("raw.jse.http.HttpEndpoint")
@SupportedSourceVersion(SourceVersion.RELEASE_11)
public class MyProcessor extends AbstractProcessor {
    @Override
    public boolean process(Set<? extends TypeElement> annotations,
                           RoundEnvironment roundEnv) {
        // TODO
        processingEnv.getMessager().printMessage(
            Diagnostic.Kind.NOTE, "Processing stuff!");
        return false;
    }
}
Annotation processors are found via the ServiceLoader,
so to register one, you need a file called META-INF/services/javax.annotation.processing.Processor to be present in the
classpath during compilation whose content is the name of the processor.
Now, to implement one, we basically need to read the annotated elements and write new Java source code from that!
There is a great library created for the purpose of generating Java code, aptly named JavaPoet. I will not use that, though, as it really wasn’t needed for the simple use case we’re discussing in this section.
The annotation we care about is raw.jse.http.HttpEndpoint. It tells us that a Java class wants to become an HTTP
endpoint, hence we must generate code to make it so.
What we want to generate is a HTTP server class that knows how to route to the annotated class… we’ve already seen how to write a HTTP server earlier, so all we need to do now is change that server a little and make it easy to add some generated code into it, based on the annotations we see in the Java class.
I adapted the previous version of the HTTP server for this purpose based on the following interface to provide request handlers:
package http.api;

import java.util.Map;
import java.util.function.Function;
import java.util.function.Supplier;

public interface RequestHandlers {
    default Map<String, Supplier<String>> getGetHandlers() {
        return Map.of();
    }

    default Map<String, Function<String, String>> getPostHandlers() {
        return Map.of();
    }
}
I used a very simple API for handlers. GET handlers implement Supplier<String>, and POST handlers implement
Function<String, String>. This is enough to satisfy our final design!
You could, of course, add more fancy features by allowing handlers to use an HTTP API of your choosing, or you could just expose the RawHTTP API (or whatever underlying HTTP library you use), but from this example, doing that should be trivial and is left as an exercise to the reader.
I then created a basic template Java class implementing this interface, to be used for codegen.
It does nearly all the work:
package http;

import http.api.RequestHandlers;

import java.util.HashMap;
import java.util.Map;
import java.util.function.Function;
import java.util.function.Supplier;

/**
 * Template for codegen by {@code HttpAnnotationProcessor}.
 */
public final class CodegenTemplateRequestHandlers implements RequestHandlers {

    private final Map<String, Supplier<String>> getHandlers;
    private final Map<String, Function<String, String>> postHandlers;

    public CodegenTemplateRequestHandlers() {
        getHandlers = new HashMap<>();
        postHandlers = new HashMap<>();

        /* ADD HANDLERS HERE */
    }

    @Override
    public Map<String, Supplier<String>> getGetHandlers() {
        return getHandlers;
    }

    @Override
    public Map<String, Function<String, String>> getPostHandlers() {
        return postHandlers;
    }
}
All that’s missing is a bunch of statements to add the real handlers to the right Maps… and that’s all we’re going to have to generate!
Basically, this line:
/* ADD HANDLERS HERE */
Will get replaced by the following generated code (based on the annotated class seen in the previous section):
var mainresource = new app.MainResource();

getHandlers.put("/", mainresource::index);
getHandlers.put("/hello", mainresource::hello);
postHandlers.put("/", mainresource::index);
Really easy, right?
The annotation processor is not hard to write.
This is the main process method implementation:
@SupportedAnnotationTypes( "raw.jse.http.HttpEndpoint" )
@SupportedSourceVersion( SourceVersion.RELEASE_11 )
public final class HttpAnnotationProcessor extends AbstractProcessor {

    /* ommitted constants */

    private static final Pattern handlersLinePattern =
            Pattern.compile( "\s+/\*\s+ADD HANDLERS HERE\s+\*/\s*" );

    @Override
    public boolean process( Set<? extends TypeElement> annotations,
                            RoundEnvironment roundEnv ) {
        if ( annotations.isEmpty() ) return false;

        var classNames = getEndpoints( annotations, roundEnv );

        try {
            try ( var reader = readCodegenTemplateRequestHandlers() ) {
                writeAppRequestHandlers( classNames, reader.lines().iterator() );
            }
            writeMainClass();
        } catch ( IOException e ) {
            processingEnv.getMessager().printMessage( Diagnostic.Kind.ERROR,
                    "Could not write classes due to: " + e );
        }

        return true;
    }
// ... more code
}
Notice how the first thing we do above is to get the HTTP endpoints from the Java class by calling
getEndpoints( annotations, roundEnv )…
Here’s how that’s implemented:
public final class HttpAnnotationProcessor extends AbstractProcessor {

    /* omitted code */

    private List<Endpoint> getEndpoints( Set<? extends TypeElement> annotations, RoundEnvironment roundEnv ) {
        return annotations.stream()
            .flatMap( annotation -> roundEnv.getElementsAnnotatedWith( annotation ).stream() )
            .map( element -> {
                processingEnv.getMessager().printMessage( Diagnostic.Kind.NOTE,
                        "found @HttpEndpoint at " + element );
                var httpEndpoint = element.getAnnotation( HttpEndpoint.class );
                return new Endpoint( ( ( TypeElement ) element ), httpEndpoint.path() );
            } ).collect( toList() );
    }
}
Once we have the endpoints, we can read the template Java class that will be used as the base for our generated new class, as follows:
public final class HttpAnnotationProcessor extends AbstractProcessor {

    /* omitted code */

    private BufferedReader readCodegenTemplateRequestHandlers() throws IOException {
        return Files.newBufferedReader( Paths.get( "framework", "src", "http",
                "CodegenTemplateRequestHandlers.java" ) );
    }
}
Finally, we pass both things to the writer method, which re-writes the template class, adding the relevant statements to put endpoints in the right maps, while also renaming the class…
public final class HttpAnnotationProcessor extends AbstractProcessor {

    /* omitted code */

    private void writeAppRequestHandlers( List<Endpoint> endpoints, Iterator<String> templateLines )
            throws IOException {
        var filer = processingEnv.getFiler();
        var fileObject = filer.createSourceFile( GENERATED_HANDLERS_CLASS );

        try ( var writer = fileObject.openWriter() ) {
            var handlersLineFound = false;
            while ( templateLines.hasNext() ) {
                var line = templateLines.next();
                if ( !handlersLineFound && handlersLinePattern.matcher( line ).find() ) {
                    handlersLineFound = true;
                    var indent = " ".repeat( ( int ) line.chars().takeWhile( c -> c == ' ' ).count() );
                    writeEndpointCreators( indent, endpoints, writer );
                    writer.write( '\n' );
                    writeHandlers( indent, endpoints, writer );
                } else {
                    writer.write( line.replace( "CodegenTemplateRequestHandlers", GENERATED_HANDLERS_NAME ) );
                    writer.write( '\n' );
                }
            }
        }
    }

    private void writeEndpointCreators( String indent, List<Endpoint> endpoints, Writer writer ) throws IOException {
        for ( Endpoint endpoint : endpoints ) {
            writer.write( indent + "var " + endpoint.getVarName() + " = new " +
                    endpoint.classElement.getQualifiedName() + "();\n" );
        }
    }

    private void writeHandlers( String indent, List<Endpoint> endpoints, Writer writer ) throws IOException {
        for ( Endpoint endpoint : endpoints ) {
            for ( Element method : getPublicMethods( endpoint.classElement, GET.class ) ) {
                var subPath = method.getAnnotation( GET.class ).path();
                writeHandlers( indent, method, endpoint, "getHandlers", subPath, writer );
            }
            for ( Element method : getPublicMethods( endpoint.classElement, POST.class ) ) {
                var subPath = method.getAnnotation( POST.class ).path();
                writeHandlers( indent, method, endpoint, "postHandlers", subPath, writer );
            }
        }
    }

    private void writeHandlers( String indent, Element method, Endpoint endpoint, String varName, String subPath, Writer writer ) throws IOException {
        writer.write( indent + varName + ".put(" +
                "\"" + joinPaths( endpoint.path, subPath ) + "\", " +
                endpoint.getVarName() + "::" + method.getSimpleName().toString() + ");\n" );
    }

}
You can see the whole thing here. It’s around 150 lines of Java code, and this is enough to power our simplified JAX-RS rip-off!
The generated Java class is saved as both .java and .class files, making it easy to inspect it and write tests.
Putting everything together
All we need to do now is compile everything and run it!
The layout of the project at this point looks like this:
.
├── annotations
│   ├── annotations.iml
│   └── src
│       └── raw
│           └── jse
│               └── http
│                   ├── GET.java
│                   ├── HttpEndpoint.java
│                   └── POST.java
├── app
│   ├── app.iml
│   └── src
│       └── app
│           └── MainResource.java
├── framework
│   ├── framework.iml
│   ├── libs
│   │   └── rawhttp-core-2.4.1.jar
│   └── src
│       ├── Main.java
│       ├── WatchDir.java
│       └── http
│           ├── CodegenTemplateRequestHandlers.java
│           ├── HttpServer.java
│           └── api
│               └── RequestHandlers.java
├── processors
│   ├── processors.iml
│   ├── resources
│   │   └── META-INF
│   │       └── services
│   │           └── javax.annotation.processing.Processor
│   └── src
│       └── processors
│           └── HttpAnnotationProcessor.java
└── raw-jse.iml
The only application class is MainResource. Here it is, again, just in case you need a refresher:
package app;

import raw.jse.http.GET;
import raw.jse.http.HttpEndpoint;
import raw.jse.http.POST;

@HttpEndpoint( path = "/" )
public final class MainResource {
    @GET
    public String index() {
        return "Welcome to the main resource.\n";
    }

    @GET( path = "hello" )
    public String hello() {
        return "Hello world!\n";
    }

    @POST
    public String index( String body ) {
        return "Got body: " + body;
    }
}
Short and sweet!
Compiling everything can be done with this bash script:
#!/usr/bin/env bash

set -e

echo "Cleaning up"
rm -rf dist/

echo "Compiling annotations"
javac annotations/src/raw/jse/http/*.java -d dist/annotations

echo "Compiling framework"
mkdir -p dist/framework
mkdir -p dist/app/http/api/
javac -cp "framework/libs/*" $(find ./framework/src -name "*.java") -d dist/framework

echo "Compiling annotation processors"
javac -proc:none -cp dist/annotations/:dist/framework $(find ./processors/src -name "*.java") -d dist/processors
cp -r processors/resources/ dist/processors/

./compile-app.sh

echo "Done"
The application class is compiled separately in compile-app.sh, so we can re-compile it easily later:
#!/usr/bin/env bash

set -e

echo "Cleaning up application"
rm -rf dist/app/

echo "Compiling application"
mkdir -p dist/app/http/api/
cp -r dist/framework/http/api/ dist/app/http/api/
cp dist/framework/http/HttpServer.class dist/app/http/

javac -cp "dist/annotations/:dist/processors/:dist/app/:framework/libs/*" \
    $(find ./app/src -name "*.java") \
    -d dist/app
Compiling the app now requires a few framework classes in the classpath, but only for the annotation processor to be able
to generate code that compiles. It needs to “see” at least the http.api.RequestHandlers interface.
We could have also generated a main class to be able to run everything without the framework and, importantly, as a native application!
Here’s what we need to add to the annotation processor to get that:
public final class HttpAnnotationProcessor extends AbstractProcessor {

    /* omitted code */

    private void writeMainClass() throws IOException {
        var filer = processingEnv.getFiler();
        var fileObject = filer.createSourceFile( GENERATED_MAIN_CLASS );

        try ( var writer = fileObject.openWriter() ) {
            writer.write( "package http;\n\n" +
                    "final class " + GENERATED_MAIN_NAME + " {\n" +
                    "  public static void main(String... args) {\n" +
                    "    System.out.println(\"Starting server on port 8080\");\n" +
                    "    var server = new HttpServer(8080);\n" +
                    "    var handlers = new " + GENERATED_HANDLERS_NAME + "();\n" +
                    "    server.run(handlers);" +
                    "  }\n" +
                    "}\n" );
        }
    }
}
As you can see, we needed the http.HttpServer class to be in the classpath in order to compile this main class
successfully.
Finally, we can run the application with hot-reloading as follows:
#!/usr/bin/env bash

java -cp "framework/libs/*:dist/framework" Main \
    "framework/libs/rawhttp-core-2.4.1.jar:dist/app:dist/annotations" \
    http.AppRequestHandlers
Remember that http.AppRequestHandlers is the generated class. Every time we re-compile the app, this class is
re-generated.
You can try it the app now!
$ curl localhost:8080/
Welcome to the main resource.

$ curl localhost:8080/hello
Hello world!

$ curl -X POST localhost:8080/ -d "this is the request body"
Got body: this is the request body%
Again, you can change the MainResource class, re-compile it, and it will automatically be reloaded.
$ curl localhost:8080/
Modified main resource.
To compile the app as a native binary, you can use this script:
#!/usr/bin/env bash

native-image -cp "framework/libs/*:dist/app" http.HttpMain
The compiled binary still weighs in at less than 10MB and starts responding to HTTP requests within around 30ms.
Notice that, at runtime, there is no reflection going on anywhere (that’s why it’s so easy to compile to native with GraalVM). The application has zero overhead despite all the magic that has been added.
Testing with JUnit
Before we move the HTTP server to production, we’d better write some tests 😛!
JUnit is the testing framework of choice in the Java world, but normally it is driven by the IDE, Maven or Gradle.
You may ask yourself, can one use JUnit by itself?
Luckily, JUnit comes with a Console Launcher which can run stand-alone!
We need to download the JUnit stand-alone jar containing all its dependencies for executing tests. We also need the JUnit Jupiter API jars to expose only the JUnit API to the test module.
I ended up with the following file structure for the new test module:
test
├── libs
│   ├── apiguardian-api-1.1.0.jar
│   ├── junit-jupiter-api-5.7.0.jar
│   ├── junit-platform-commons-1.7.0.jar
│   └── opentest4j-1.2.0.jar
├── runtime-libs
│   └── junit-platform-console-standalone-1.7.0-all.jar
├── src
│   └── http
│       └── MainResourceTest.java
└── test.iml
The libs in test/libs are exposed to the test module classes, while the test/runtime-libs contain only the
JUnit stand-alone jar.
The test/src/http/MainResourceTest.java file is a trivial unit test:
package http;

import app.MainResource;
import org.junit.jupiter.api.DisplayName;
import org.junit.jupiter.api.Test;

import static org.junit.jupiter.api.Assertions.assertEquals;

public class MainResourceTest {

    @Test
    @DisplayName( "GET requests should receive the Hello World response" )
    public void canSayHello() {
        var resource = new MainResource();
        assertEquals( "Hello world!\n", resource.hello() );
    }

}
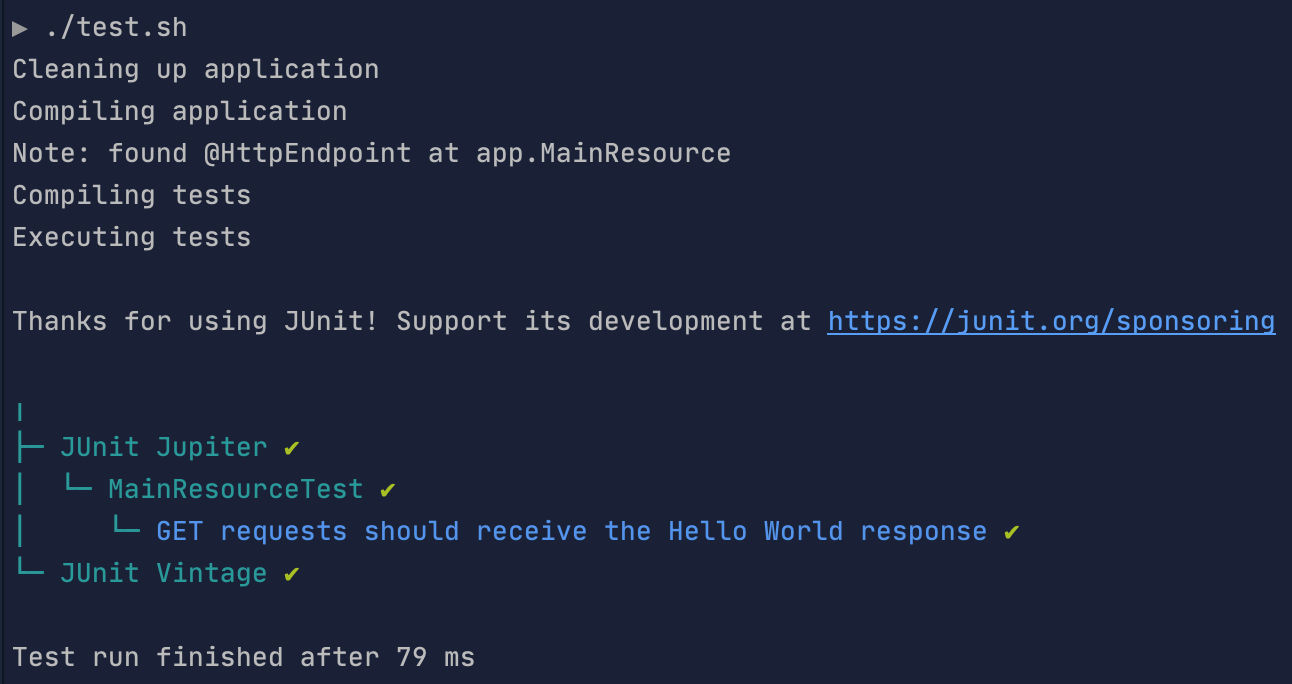
To compile and execute the tests, I wrote the following bash script:
#!/usr/bin/env bash

set -e

./compile-app.sh

mkdir -p dist/test

echo "Compiling tests"
javac -cp "test/libs/*:dist/app" \
  $(find ./test/src -name "*.java" ) \
  -d dist/test

echo "Executing tests"
java -jar test/runtime-libs/junit-platform-console-standalone-1.7.0-all.jar \
  --fail-if-no-tests \
  -cp "dist/app:dist/annotations:dist/test" \
  --scan-classpath
This is what it looks like when I run it on my machine:
Writing integration tests that actually start the HTTP server should not be much harder than this. Just create a new
test module, say integration-test, write a simple test harness to start and stop the HTTP server, then write
HTTP client-based tests using the same mechanism.
This post is already very long, so I will not show how to do all that, hopefully what I’ve shown here is enough to get you started should you want to do that yourself!
Building Java with Java
One last thing that I would really recommend doing is to get rid of non-portable bash scripts. We have Java at our hands, so why should we spoil its great support for running on almost any platform by relying on archaic bash scripts (please, don’t even mention Make).
Luckily, we don’t need to introduce some complex build system to solve this problem. Java can execute single-file Java programs directly from source, which is perfect for creating an ad-hoc build system!
We can even add libraries to the Java file without problems as long as we follow the same convention we’ve been following
for all other Java code so far: put it in its own “module”, with its own libs folder and IDE support.
Because the most common task in a build is to do IO (processes, read/write files…) and doing IO in Java is a pain, I used Apache Commons I/O to help me get a fairly simple build file which replaced all the bash scripts I had created earlier.
Here’s the build module file structure I ended up with:
build
├── build.iml
├── libs
│   └── commons-io-2.8.0.jar
└── src
    └── Build.java
You can see the whole Build.java file source online, but here’s what the main looks like:
class Build {
    /* ommitted constants */
    public static void main( String[] args ) {
        timing( "Build SUCCESS", () -> {
            System.out.println( "Building..." );
            prepareCleanDir( frameworkDist, annotationsDist, processorsDist, appDist );
            compile( findJavaSources( frameworkSrc ), frameworkDist, frameworkLibs );
            copyDir( frameworkDist, appDist, runtimeFrameworkClasses );
            compile( findJavaSources( annotationsSrc ), annotationsDist );
            compile( findJavaSources( processorsSrc ), processorsDist, annotationsDist.getPath() );
            copyDir( processorsResources, processorsDist );
            compile( findJavaSources( appSrc ), appDist,
                    annotationsDist.getPath(),
                    appDist.getPath(), processorsDist.getPath(), frameworkLibs );
            compile( findJavaSources( testSrc ), testDist, testLibs, appDist.getPath() );
            runTests( junitJar, testLibs, testDist.getPath(), appDist.getPath() );
        } );
    }
    /* ... more code */
}
Executing this build takes less than 5 seconds:
$ java -cp "build/libs/*" build/src/Build.java
Building...
Command 'javac framework/src/http/CodegenTemplateRequestHandlers.java framework/src/http/HttpServer.java framework/src/http/api/RequestHandlers.java framework/src/Main.java framework/src/WatchDir.java -d dist/framework -cp framework/libs/*' executed in 0.89 seconds
Command 'javac annotations/src/raw/jse/http/POST.java annotations/src/raw/jse/http/HttpEndpoint.java annotations/src/raw/jse/http/GET.java -d dist/annotations' executed in 0.52 seconds
Command 'javac processors/src/processors/HttpAnnotationProcessor.java -d dist/processors -cp dist/annotations' executed in 0.83 seconds
Note: found @HttpEndpoint at app.MainResource
Command 'javac app/src/app/MainResource.java -d dist/app -cp dist/annotations:dist/app:dist/processors:framework/libs/*' executed in 0.81 seconds
Command 'javac test/src/http/MainResourceTest.java -d dist/test -cp test/libs/*:dist/app' executed in 0.59 seconds

Thanks for using JUnit! Support its development at https://junit.org/sponsoring

╷
├─ JUnit Jupiter ✔
│  └─ MainResourceTest ✔
│     └─ GET requests should receive the Hello World response ✔
└─ JUnit Vintage ✔

Test run finished after 78 ms
[         3 containers found      ]
[         0 containers skipped    ]
[         3 containers started    ]
[         0 containers aborted    ]
[         3 containers successful ]
[         0 containers failed     ]
[         1 tests found           ]
[         0 tests skipped         ]
[         1 tests started         ]
[         0 tests aborted         ]
[         1 tests successful      ]
[         0 tests failed          ]

Command 'java -jar test/runtime-libs/junit-platform-console-standalone-1.7.0-all.jar --fail-if-no-tests -cp test/libs/*:dist/test:dist/app --scan-classpath' executed in 0.57 seconds
Build SUCCESS in 4.29 seconds
Closing thoughts
The Java SE Platform is very powerful, which has facilitated the creation of numerous Java frameworks for a couple of decades. Using “raw” Java SE has never been a very popular choice despite the platform itself providing most of the primitives people want from a framework (with the huge number of easily available Java libraries making up the rest).
I am not arguing for abandoning all frameworks and using only Java SE for all applications, but I hope I have convinced you that the idea is not as crazy as it may sound at first.
If the list of most important concerns you have when creating a particular application include all of the items below, I think you may have a good case for actually going bare-metal with Java and avoiding framework lock-in:
- simplicity.
- minimal dependencies.
- maximum control.
- access to powerful features.
- longevity (not built on technology that will be outdated in 10 years).
- very low footprint.
If, on the other hand, you want to quickly release applications that tend to do similar things (e.g. CRUD applications), and you don’t expect them to be running with minimal changes several years into the future, then by all means, use a framework that you know well (or can hire people who do)!
Whatever you choose, learn your tools and use them well.
Thank you for reading!
Footnotes:
[1] There is also Java Embedded, Java ME, Java Card and even Java TV.
[2] They achieve low-memory consumption and instantaneous startups by leveraging on GraalVM and avoiding, in some cases, reflection-heavy frameworks.
[3] Vert.x Core, the lowest level API Vert.x exposes, includes not just HTTP but also its async runtime, an event bus, websockets, JSON, an improved file system API, and even cluster management. Jetty, on the other hand, exposes HTTP via the Servlet Specification which I really don’t like as it creates an extra layer on top of HTTP so that even if you know HTTP like the back of your hand, you still need to learn Servlets because it’s not obvious how it exposes (or hides!) HTTP concepts.
[4] You can still create instances of annotations at runtime, but that requires using a Proxy. I wrote a library once, Javanna, to both parse and create annotations at runtime. Because annotations may only contain pure data, I thought it was a good idea to try and use them as data carriers… It turns out it is possible, but it’s not so convenient… luckily, records are arriving soon and will be a much better solution to that problem!