How I wrote my own Smart Home software

I’ve wanted to automate my home for a long time… having a background in industrial automation and software development, it felt like I was in a great position to be an early adopter.
However, every time I looked into it, I quickly gave up because of two main problems:
- the sheer complexity of it all.
- prices.
The complexity seems to be intentional on the part of most vendors. They tend to not make it clear whether their products work with any controller (if you’re completely new to home automation, don’t worry, we’ll see soon what this means), which software can be used, which devices are compatible with what…
Prices of smart devices have always been ridiculously high, at least one order of magnitude higher than their dumb counterpart. That’s understandable when a technology is still in its early days. But home automation solutions have now been around for a long time!
It’s about time smart home devices became more accessible. Well, they may still not be cheap, but finally, prices have gone down enough that I’ve finally decided to take the plunge and get myself a few smart things to start playing with!
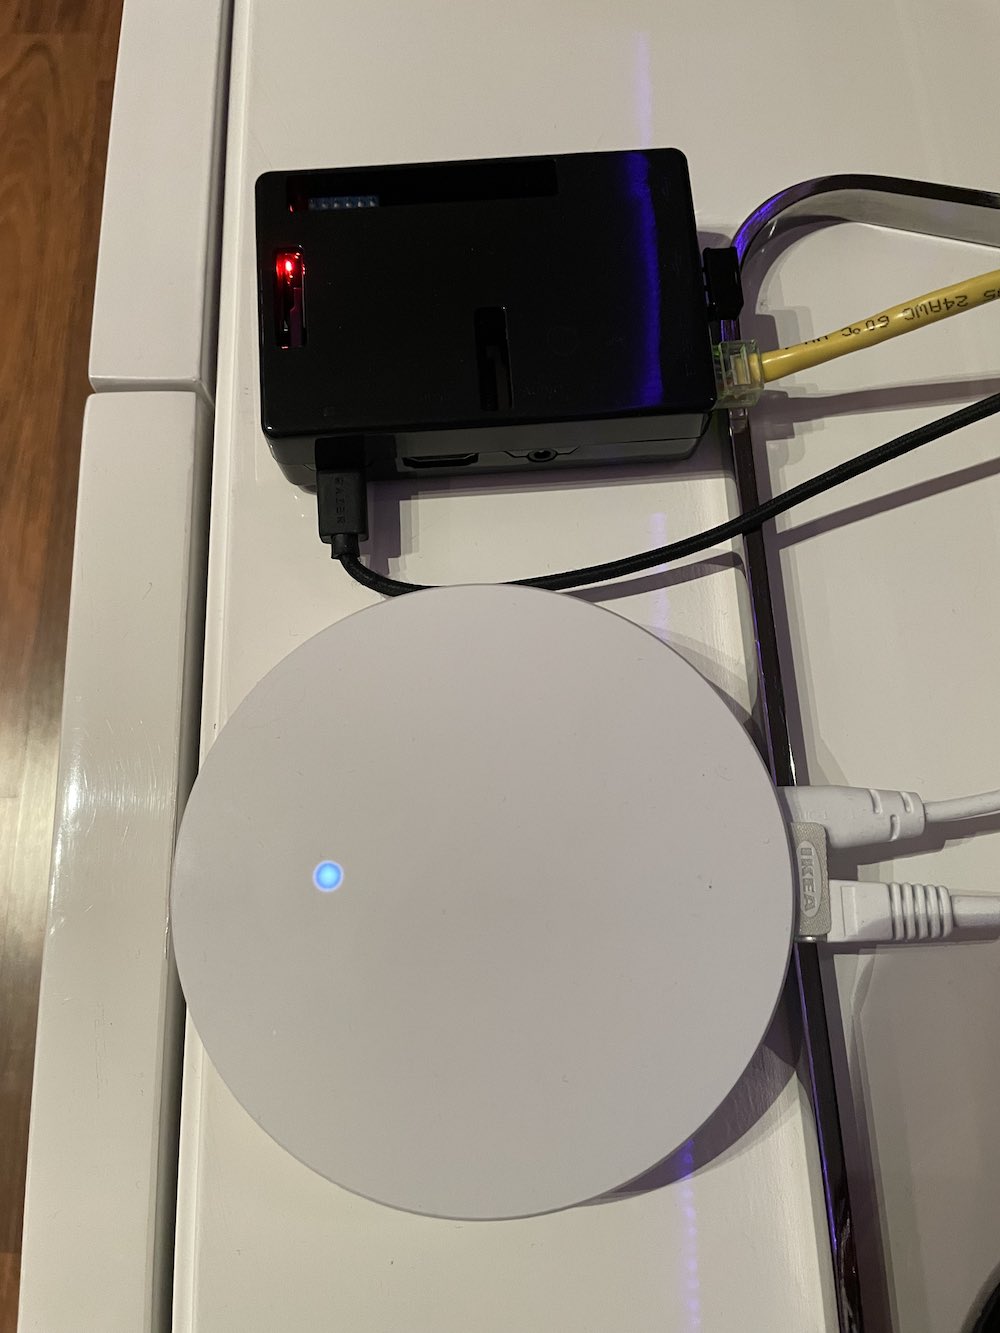
I got a few power plugs, a motion sensor, a little button that can be programmed to do whatever, and a smart home controller to connect to it all.
A smart home controller is a hub that connects to all sensors (e.g. thermometers, power consumption meters etc.) and lets you get information about them, as well as control devices which can be controlled (e.g. turn on lights, change their colors, open/close the curtains, water the garden etc.).
I chose to buy an IKEA Dirigera to start with because at least where I am, IKEA smart things are the cheapest by far! But also because IKEA’s smart home products use Zigbee, which is a widely used protocol for home automation, so I could easily migrate to another hub (another name for the controller that manages the things) at some point, if desired (which I did, as we’ll see).
I also got a Wifi light strip from IP-Link for good measure (it’s pretty awesome!).
After learning how to use the apps (from IKEA and IP-Link), including integrating them with my Google Nest Hub, I was a little bit underwhelmed. Even though it’s really cool to be able to say “hey Google, turn on the lights in the main bedroom”, and it just works(!), there’s very little automation you can actually do beyond what’s achievable with good old dumb electronics because of all the limitations of the apps.
What I really wanted was to be able to program my home, like I can program my software, well beyond what some manufacturer’s app allows me to.
Thus started my chase for the perfect smart home software setup!
The usual smart home software people use
At first, I tried a few smart home automation servers which are normally the “obvious” choices for this kind of stuff.

OpenHAB is a Java-based server which uses OSGi for its plugin system, meaning it can load/unload plugins at runtime to support an enormous amount of add-ons for seemingly every smart home product.
Even though OpenHAB looks great, it’s a complex system. Understanding its concepts and how to configure a nice dashboard, install things, add automations is very time consuming, I believe (if I remember correctly) I spent a few days on it and only managed to get one thing connected, and didn’t really get to the point where I had a working dashboard at all.
I also looked at what is probably the most popular smart home hobbyist server, HomeAssistant. It looks pretty, has an easier setup than OpenHAB, has a neat USB Dongle that makes things even easier… but what put me off with HomeAssistant were two things: first, it’s based on Python. I have a strong aversion to Python due to its horrendous package management history (we use dozens of languages at work, guess which language is the only one that causes build issues all the time?). It’s a nice language, but for things like home automation, having build/dependencies problems is the absolute last thing I need.
The biggest problem with HomeAssistant, however, is its really overengineered setup for running on mini computers like the Raspberry Pi, which was my goal.
The recommended way to run it is with a fleet of Docker containers (and they even tell you to install their own Linux distro to make sure all the large amounts of software you’ll need is managed more easily).
Just imagine for a second, you’re automating your house to do little things like turn on a light at a certain time… perhaps open the curtains in the morning as your alarm sets off in the morning. Is the best solution we can come up with a bunch of Docker containers running on a custom Linux distro?
As with OpenHAB, this all felt way more complex and heavy than I was hoping for. And I couldn’t even find a way to use them to actually write code to perform automations the way I wanted, rather than limited visual programming tools which seem to be the standard way of doing things in this world (no, thanks!).
Raspbee 2 and deCONZ REST API
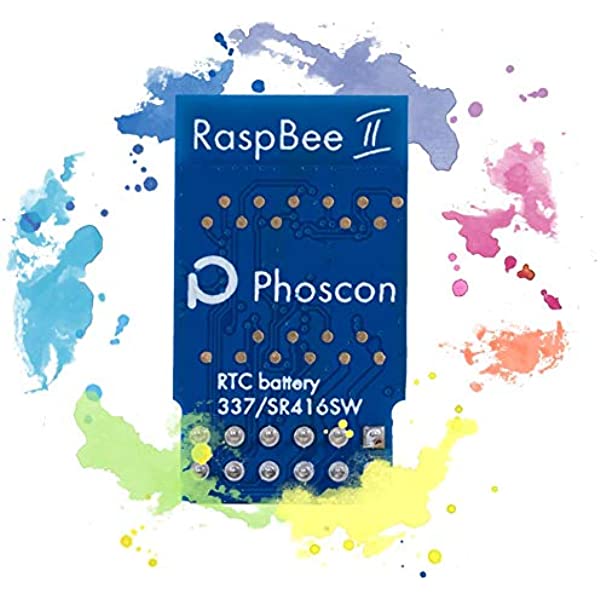
That’s when I finally found something that made sense to me: the Raspbee 2 Zigbee Gateway, which is a tiny circuit board you plug directly on the Raspberry Pi’s GIO plug (they also have a USB dongle version).
You then connect to it using either their simple web-based app (useful to set it up) or the deCONZ REST API they expose.
This is exactly what I am looking for!
Having full access to my smart things via a REST API would, after all, allow me to write code in whatever programming language I’d like.
The next challenge was to decide what stack to use to create a little web application I and my family could use to interact with the smart things… I wanted something extremely light so I could run it even on an older Raspberry Pi 2 that I had lying around with low power consumption… also the less complex, the better chances are it will still be working 10 years from now, which I think is very important for something that’ll become part of the house.
By chance, I found a solution which I didn’t expect at all (I work with Java, but wanted to avoid it as I know it’s far too memory-heavy and slow on small devices): Lua.
Why Lua?

Lua was designed to be embedded in C programs. It’s probably the lighest practical language you’ll find.
Justine’s Redbean web server, which is an αcτµαlly pδrταblε εxεcµταblε that embeds Lua and SQLite and runs on most Operating Systems (the same file!), is a mere 2.2 MB download and runs using less than 1MB of RAM.
For this reason, I considered using Lua and was delighted to find out that there was a really lightweight web server made exactly for things like this: the Mako Server.
The Mako Server is based on the Barracuda Application Server, which was designed to work on embedded devices. It supports VxWorks, QNX, Zephyr, FreeRTOS+TCP and lots of other OSs, including of course the mainstream ones, Linux/Windows/MacOS!

Mako has a special download for the Raspberry Pi which comes with support for using GPIO from Lua. I built it from source on my Pi and it only took a few seconds.
What is the most amazing is the amount of stuff packed into this tiny server: a HTTP Client, JSON/UBJSON parser, SMTP, MQTT, TLS, SQLite, and obviously, Lua and LSP (Lua Server Pages) which makes it easy to generate web content.
The result is a web server that uses less than 3MB of RAM (even including the built-in Mako, Barracuda and Lua’s complete Docs, and a code editor for changing things on the fly) while running and that I can code live.
In the rest of this blog post, I’ll show how to get started with the Mako Server, and how to use it to talk to the deCONZ API to automate any smart home setup.
Getting started with Mako
The Mako Server does not really need to be installed on a system… it consists of just a single binary executable file and its companion mako.zip file which contains some Lua libraries and other resources.
Go to the Download Mako Server page and choose your platform on the menu for instructions on how to get it.
As I am going to be using a Raspberry Pi to run Mako, I chose the Raspberry Pi section, which explains that Mako needs to be built on the Pi itself.
A lot of software is very complicated to build, but Mako is one of the easiest pieces of software I’ve ever built! So, don’t let this scare you!
Here are the exact steps of what I did, so you don’t even need to go anywhere if you’re also using a Pi to run Mako!
First thing you need to do, is make sure you have some really basic utilities installed on your system (and I am assuming a Debian-based Linux distribution, like Ubuntu or Mint).
Open up a terminal and run the following commands:
sudo apt update
sudo apt install git unzip gcc make

mkdir mako
cd mako
wget -O build.sh - https://raw.githubusercontent.com/RealTimeLogic/BAS/main/RaspberryPiBuild.sh
I am deviating a little bit from the official instructions because I think it’s important to understand what’s happening… above, all we’ve done was create a new directory to install mako on, then downloaded a bash script into build.sh that runs the build.
On your text editor, have a look at that file and make sure you’re happy with what it’s doing… it’s a very simple build file, so you should be able to understand exactly what’s going to do.
Now, just execute the file.
chmod +x ./build.sh
./build.sh
It should take a couple of minutes.
At the end, it should ask you if you want to _install the Mako server in /usr/local/bin, which is optional to do. If you accept that, it just copies both the mako executable and its companion, mako.zip, into bin:
renato@renato-desktop:~/mako$ du -h /usr/local/bin/*
2,9M	/usr/local/bin/mako
492K	/usr/local/bin/mako.zip
180K	/usr/local/bin/periphery.so
The periphery.so file seems to be a Raspberry Pi specific library for controlling the GPIO.
That gives us a fully functional web server, with lots of functionality as we’ll find out, in less than 3.5MB!
Finally, you can run mako (or ./mako if you didn’t install it) to start the server!
When Mako starts up, it prints the ports it’s listening to, so now you just need to open a browser and go to localhost:<port> to see the initial page:
Before we start writing some code, download the tutorials.zip file from the Download Mako Server Documentation and Tutorials page, or just run the following command:
wget https://makoserver.net/download/tutorials.zip
unzip tutorials.zip
Now, you should have several zip files in the local directory, including badoc.zip (the Barracuda Server Full Documentation) and lspappmgr.zip (an Application Server, as we’ll see) amongst others. Each zip file is a Mako application.
Stop the server if you left it running, then start it up with both the docs and the application server apps by entering the following command:
mako -ldocs::badoc.zip -l::lspappmgr.zip
The -l option specifies:
- the path where to deploy the application (leave empty for default
/). - the priority (higher priority apps can handle requests first).
- the application zip (or a directory with the app files).
So, the command above starts the badoc.zip app on path docs, and lspappmgr.zip on the default path.
You can now open the docs at (supposing the server is on port 9357) http://localhost:9357/docs/, and the application manager at http://localhost:9357/!
The Barracuda Documentation is pretty comprehensive (it even includes the Lua docs and the various Lua libraries included by default, like json, http, crypto and many others), if a bit confusing at first as it includes a lot of details that won’t make sense until you’ve learned a little bit more about it. Having it running locally on your own server is great!
But to get directly into the action, open the application manager… you should see the following:
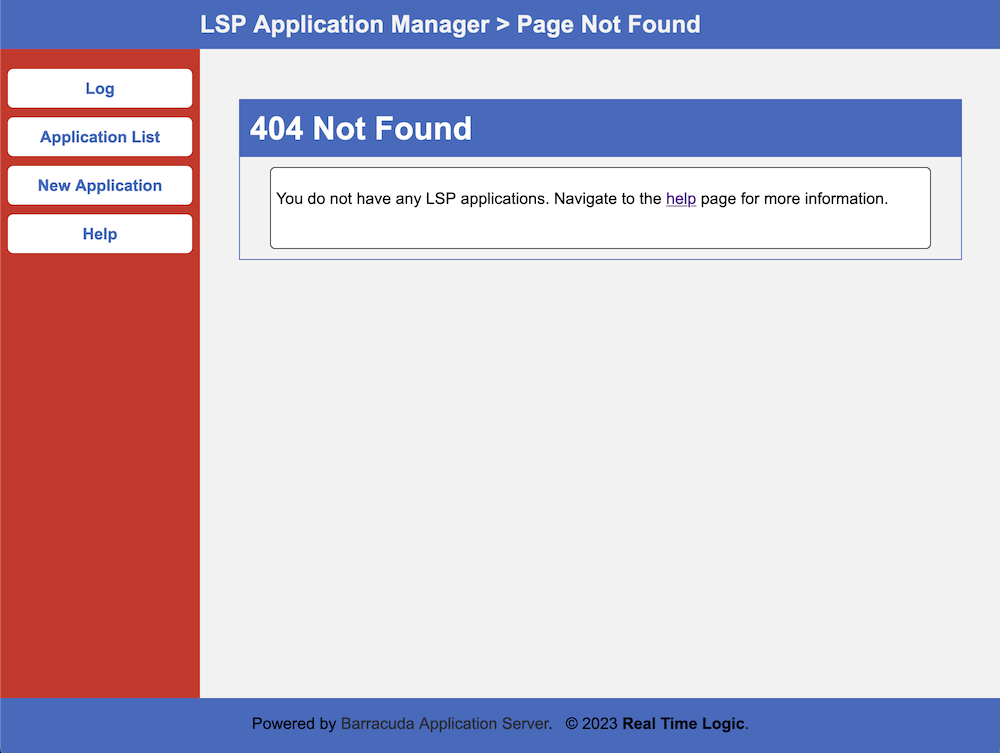
LSP Application Manager
This web application allows us to create, change and deploy LSP (Lua Server Pages) applications, even from another machine! For example, you can keep running the Mako Server on the Pi, but use your main computer to develop your code!
Just find out your Pi’s IP address (on Ubuntu, use ip -4 a), then connect to it from any other machine on the same network.
Now, to create a new application, click on the New Application button, choose where to store it by clicking on the Browse button and use the file picker to create a new directory using the mouse right-click (home is the working directory, disk is your Pi’s root file system). You could just pick an existing directory as well, of course. Double-click on the chosen directory to select it.
There’s a video tutorial about using the LSP App Manager, running it on a tiny ESP32 microcontroller with 320 KiB RAM, 448 KiB ROM!
I created a directory called smarthome, clicked on Submit, left the default values in the Configure scren and then clicked on Submit again. Check the video linked in the text box above if you need help.
At this point, you should see this screen:
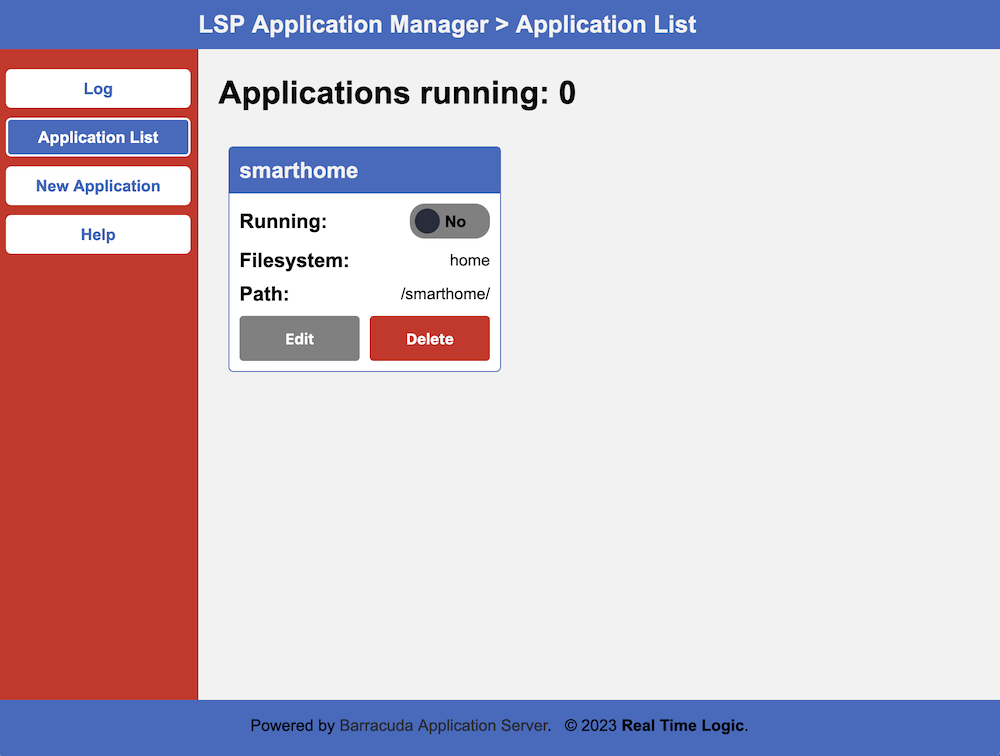
LSP App Manager with apps running
Flip the Running switch to start up the app, then hit Edit!
This opens up a really simple IDE where you can start coding!
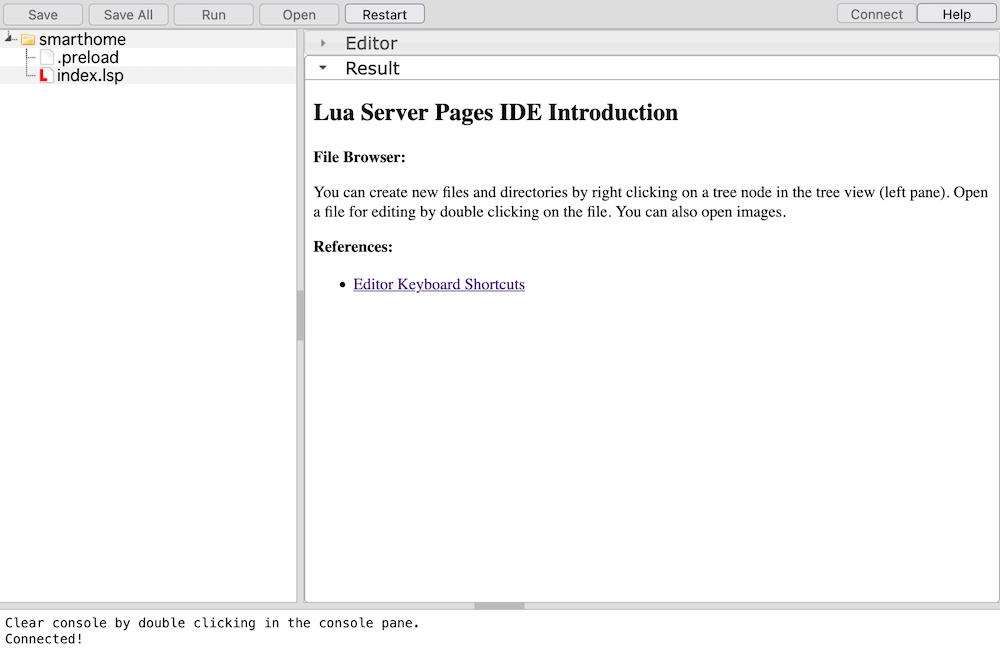
LSP App Manager IDE
Open index.lsp file, which creates the initial page for our application, in the Editor tab.
It looks like this:
<!DOCTYPE html>
<html>
  <head>
     <meta charset="UTF-8"/>
    <title>MY LSP</title>
  </head>
  <body>
     <?lsp
       response:write('<p>', "こんにちは世界", '</p>')
       print"Hello World"
       trace"Hello World"
     ?>
  </body>
</html>
You can click on the Run button to see what it generates.
Notice that the code between <?lsp and ?> is Lua code. That’s the dynamic part of the application. This allows us to use data from a database, fetch information from web APIs and anything else we may want, as the code is running on the server and therefore is not as restricted as web clients are.
The code above shows the
response:write(which is used to send content to the HTTP client),trace(which is used to log server-side). You can find these functions in the documentation, either by opening thebadoc.zipapp that comes with the tutorials zip file, or online.
Outside of the <?lsp ... ?> tag, everything is just normal HTML… but you can include simple Lua expressions within HTML like this:
<h2>System: <?lsp= ba.exec('uname -a') ?></h2>
ba is the Barracuda Application namespace, which contains lots of useful functionality… you can find its docs in the Barracuda Docs, under Lua > APIs > ba… take the opportunity to check the standard APIs, like request, response, cookie, session, io, json, authentication/authorization, and the many Auxiliary APIs as well (stuff like crypto, mail, socket, thread is there)!!
If you like to use REPLs, you can download xlua (at the end of this page), which is an enhanced Lua REPL including most Mako’s Lua APIs.
The .preload script and Lua modules
You may have noticed that, in the default IDE app, there’s another file besides index.lsp, called .preload.
This is a Lua file that runs whenever the application starts up. It can be used to setup the application, read configuration and so on.
Files or directories that start with a
.are hidden, and hence cannot be accessed from outside the server. Anything else can! For example, navigate to/smarthome/index.lspon your server and you should see the rendered LSP page (and because this page is namedindex, just going to/smarthome/should also show that).
If you change the .preload file, you need to save it and then restart your application to re-run it, which you can do by pressing the Restart button.
One thing you probably want to do in .preload is call mako.createloader(io).
This allows the Lua code to require other Lua files from the application itself (in addition to the standard Lua search path).
To demonstrate that, create a new file in the application folder at .lua/devices.lua with the following contents:
-- use a module namespace
local dv = {}

function dv.isOn(device)
   return device.attributes.isOn and true or false
end

return dv
This function is just a basic example (based on the Dirigera API which I was trying to use early on), so don’t read too much into it.
Now, in index.lsp, do something like this (showing only the Lua code in most LSP snippets):
local dv = require 'devices'

local mockDevice = {
    attributes = { isOn = true }
}

print('Is device on?', dv.isOn(mockDevice))
You should see the Is device on? true output.
Once
required, Lua does not normally reload a module. To force Lua to do so when you make changes to the module, add this line, where"device"is the name of the module to unload, to the beginning of the.preloadscript, then restart the application:package.loaded["devices"] = nil.
Breaking up pages into separate files
To make web pages easy to manage, it’s a good idea to break out some common parts, like headers and footers, into their own pages, which can then be included in other pages as needed.
To do that is easy, thanks to response:include.
I’ve created a directory called .fragments/ (starting with a . so it won’t be served directly by the server) containing the following files in it:
header.html:
<!DOCTYPE html>
<html>
<head>
  <meta charset="UTF-8"/>
  <title>SmartHome</title>
  <link rel="stylesheet" href="/smarthome/style.css">
</head>
<body>
<header class='top-header'>
    My SmartHome
</header>
<main>
footer.html:
</main>
</body>
</html>
I also added the linked style.css file in the application root dir so the page looks half decent:
main {
  margin: 2em;
  font-family: Verdana, sans-serif;
}

.top-header {
  font-size: 3em;
  background: #0D6986;
  color: white;
  margin: 0;
  padding: 1em;
  font-family: 'Brush Script MT', cursive;
  font-style: italic;
}
Now, to build a full page (e.g. index.lsp) is simple, just include the header and the footer, and add some content in the middle:
<?lsp
response:include "/smarthome/.fragments/header.html"
response:write('<h1>My Page goes here!</h1>')
response:include "/smarthome/.fragments/footer.html"
?>
Which should look like this:
Adding another page that uses the same headers and footers now becomes trivial.
Directory functions, routing
To visit the page hello.lsp in our application, which was started at the /smarthome/ path, you would just type http://<ip-address>/smarthome/hello.lsp. That works well, but sometimes it’s useful to handle a URI path using a handler function that decides what to do, instead of just mapping to exact pages, like in a file system.
For example, in a Smart Home web application, we’ll need to have some dynamic content so we may want to implement an API that allows Javascript code running on the client to update data without refreshing the page.
Directory functions allow us to do just that.
We can install a directory function in the .preload file, as shown below:
local function handleApiCall(_ENV, path)
   paths = string.gmatch(path, "([%w_-]+)(/?)")
   response:forward("/smarthome/.api.lsp")
end

local apiDir = ba.create.dir("api")
apiDir:setfunc(handleApiCall)
dir:insert(apiDir, true)
This will send requests for any path like /<app-root>/api/* to the .api.lsp page.
This example makes the paths segments available to that page as a page-global variable.
The .api.lsp page can then do whatever it wants with that:
<?lsp
response:setheader("Content-type", "text/plain")
for p in paths do
  print('path segment:', p)
end
?>
Sending a HTTP request to http://192.168.1.77:9357/smarthome/api/foo/bar should now result in the following response:
HTTP/1.1 200 OK
Date: Thu, 23 Mar 2023 18:50:08 GMT
Server: BarracudaServer.com (Posix)
Content-type: text/plain
Transfer-Encoding: chunked
Keep-Alive: Keep-Alive

path segment:	foo
path segment:	bar
We could as easily return JSON content (notice that by using the response:json function we don’t even need to set the content-type header):
<?lsp
local data = {}
for p in paths do
  table.insert(data, p)
end
response:json({ data = data })
?>
Now, a HTTP request to http://192.168.1.77:9357/smarthome/api/foo/bar results in:
HTTP/1.1 200 OK
Date: Thu, 23 Mar 2023 18:55:28 GMT
Server: BarracudaServer.com (Posix)
Content-Length: 22
Content-Type: application/json
Cache-Control: no-store, no-cache, must-revalidate, max-age=0
Keep-Alive: Keep-Alive

{"data":["foo","bar"]}
This means we’re able to both build HTML pages and generate typical JSON API responses from the server, making it easy to create a dynamic web application.
Authentication
I do not intend for my home automation server to be accessible on the Internet. That’s far too risky.
It may be a good idea to configure a VPN or similar solution to safely access a home network from the Internet. That is much easier to do safely than to expose any web server directly to the Internet.
However, letting anyone who happens to be able to connect to my Wifi to manage my houses devices also doesn’t sound ideal, so I think it’s prudent to add a simple authentication mechanism to the server.
Luckily, Mako supports several authentication methods (see the Authentication section in the docs).
To activate authentication, however, you’ll also need to enable HTTPS.
You may have noticed that the Mako server automatically generated a TLS Certificate the first time it started up.
Here’s the message it printed:
renato@renato-desktop:~/mako$ mako

Mako Server. Version 3.9
BAS lib 5412. Build date: Mar 20 2023
Copyright (c) Real Time Logic.

EPOLL dispatcher; maxcon: 262144
Mounting /usr/local/bin/mako.zip
Server listening on IPv6 port 9357
Server listening on IPv4 port 9357
Loading certificate MakoServer
SharkSSL server listening on IPv6 port 9443
SharkSSL server listening on IPv4 port 9443
SharkSSL is the TLS library included in the Mako Server. As you can see, it generated a TLS certificate and started listening on port 9443 using a secure socket.
Mako has support for generating TLS Certificates using
Let's Encrypt, see the sectionMako Server > mako.conf > Let's Encryptin the Documentation for more details.
Opening https://<ip-address>:9443/ on a browser should result in a warning page saying that the TLS certificate cannot be trusted. That’s ok, because the TLS certificate the server is using is not trusted by the browser yet.
There are ways to trust your self-signed TLS certificate in your devices, but doing that is out of scope for this blog post.
I ended up not completely finishing setting up either authentication or TLS for now because I kind of ran out of time. I got just far enough to know that I can add that later when I have more time.
The next step is to actually talk with the smart devices, so we can display and send them commands.
HTTP Client
I currently have three kinds of smart home devices: ZigBee devices connected through the IKEA Dirigera Hub, “independent” ZigBee devices, and a couple of Wifi light strips.
Unfortunately, talking to the Wifi devices requires going through their manufacturer’s APIs. Google Home/Apple SmartKit/Amazon Alexa are able to interact with them via their APIs but they do not make it easy for anyone else.
TP-Link seems to be actively hostile to third-party integrations like Home Assistant.
The IKEA ZigBee devices talk the standard ZigBee protocol, so it’s possible to enlist them to the Raspbee 2 hub, making the Dirigera Controller unnecessary. That’s what I ended up doing (though I still haven’t moved everything off the Dirigera yet, as by doing that I temporarily lose integration with the Google’s voice assistant, which is a must at home).
The deCONZ API is easy to use. The Lua HTTP Client even easier, as I’ll show below!
To make HTTP calls to the Raspbee 2 you need to obtain the API key first. The deCONZ docs explain how to do that. Once you got it, the URLs for accessing the devices’ data looks like this:
local conf = require "loadconf"

local sensorsUrl = conf.sensorsServerUrl .. "/api/" .. conf.deconzKey .. "/sensors/"
local lightsUrl = conf.sensorsServerUrl .. "/api/" .. conf.deconzKey .. "/lights/"
local metadataUrl = conf.sensorsServerUrl .. "/api/" .. conf.deconzKey .. "/config"
The loadconf module is part of Mako and allows easy access to the mako.conf file, which I used to store the API key and the location of the deCONZ server.
Here’s what my basic HTTP requests look like:
local function readJsonResponse(req)
   local status = req:status()
   local body = req:read "*a"
   if status == 200 then
      if string.match(req:header()['Content-Type'] or '', 'application/json') then
         return ba.json.decode(body), nil
      else
         return nil, string.format('not a JSON response: %s', body)
      end
   end
   return nil, string.format('bad status (%d): %s', status, body)
end

local function getJsonData(url)
   local req = http.create()
   local ok, err = req:request { url = url }
   local data
   if ok then
      data, err = readJsonResponse(req)
   end
   req:close()
   return data, err
end
WebSockets
It’s quite nice to be able to update the web application as events happen… For example, if you have motion sensors in the house, you probably expect to see when it detects movement in real time.
The deCONZ API exposes websockets for that.
From Mako, it’s also very easy to connect to a websocket:
function deconz.connectWebSocket(notifier)
   local server = wsServer .. ':' .. tostring(findWsPort())
   local req = http.create()
   local ok, err = req:request { url = server }
   if not ok then req:close(); error(err) end
   if req:status() ~= 101 then
      trace("deCONZ server responded with unexpected status: ", req:status())
      req:close()
      error("deCONZ server did not open websocket: " .. server)
   end
   local sock = ba.socket.http2sock(req)
   sock:event(function(s)
         while true do
            local data = s:read()
            if not data then break end
            notifier(ba.json.decode(data))
         end
         trace 'deCONZ Websocket terminated'
   end)
end
On the JavaScript side in my frontend, I also had to connect to a websocket which kept the frontend up-to-date when the deCONZ websocket pushed events. It sounds complicated, but it’s pretty simple, it’s just two websockets, one between the server and deCONZ, and another between the JS client and the server…
To handle a websocket from the JS client requires some odd code in the LSP page where you want the websocket to connect:
if request:header "Sec-WebSocket-Key" then
   local sock = ba.socket.req2sock(request)
   if sock then
      local listener = { listening = true, sock = sock }
      table.insert(app.deconzListeners, createDeconzEventListener(listener))
      sock:event(socketHandler(listener), "s")
      request:abort()
   end
end
response:senderror(403, "Invalid request")
This upgrades a normal HTTP request to a websocket connection on the server… The event listener is just a function that handles events:
local function createDeconzEventListener(listener)
   return function(event)
      if not listener.listening then
         error "stopped listening"
      end
      if event.id then
         local sock = listener.sock
         if event.e == 'changed' and event.r and event.state then
            sock:write(ba.json.encode({
                             id = event.id,
                             r = event.r,
                             type = 'changed',
                             state = event.state
                                     }), true)
         elseif event.e == 'deleted' then
            sock:write(ba.json.encode({
                             id = event.id,
                             type = 'deleted'
                                     }), true)
         else
            --trace('unknown event kind or missing data', ba.json.encode(event))
         end
      else
         trace('ignoring event', ba.json.encode(event))
      end
   end
end
With this, I now had a pretty dynamic web application in place with live data about my home!
The final web app
Finally, there’s enough pieces to put together a web application to be used as a frontend for the home automation system.
To implement the frontend, I opted to use vanilla JavaScript code, but you could use any web framework you’d fancy… the server just needs to serve the resources it expects, and handle the requests made from the JS client using either LSP pages or virtual directory pages.
The index.lsp page I create pre-loads data so that the page doesn’t need to fetch any data after loading (it’ll only update when something happens, via websocket events).
My LSP home page does something like this to preload the data and connect to the websocket:
<?lsp
response:include "/smarthome/.fragments/header.lsp"

-- some uninteresting code here

local sensors = {}
local lights, errorMessage = lightsData()
if not errorMessage then
   sensors, errorMessage = sensorsData()
end

?>

<div id='error-message' class='error'><?lsp= errorMessage or '' ?></div>
<h2>Weather</h2>
<div id='weather'></div>
<h2>Lights</h2>
<div id='lights'></div>
<h2>Sensors</h2>
<div id='sensors'></div>
<script src="js/home.js"></script>
<script>
const lightsData = <?lsp= ba.json.encode(lights) ?>;
const sensorsData = <?lsp= ba.json.encode(sensors) ?>;
const weatherData = <?lsp= ba.json.encode(weather.latest()) ?>;

// start websocket connection
const protocol = window.location.protocol;
const host = window.location.host;
const port = window.location.port ? ':' + window.location.port : '';
webSocket = new WebSocket((protocol == 'http:' ? 'ws:' : 'wss:') +
   '//' + host + port + '/smarthome/control-ws.lsp');
webSocket.onopen = (event) => Control(lightsData, sensorsData, weatherData, webSocket);
</script>
<?lsp
response:include "/smarthome/.fragments/footer.html"
?>
And this is what the home page looks like after a little bit of polishing:
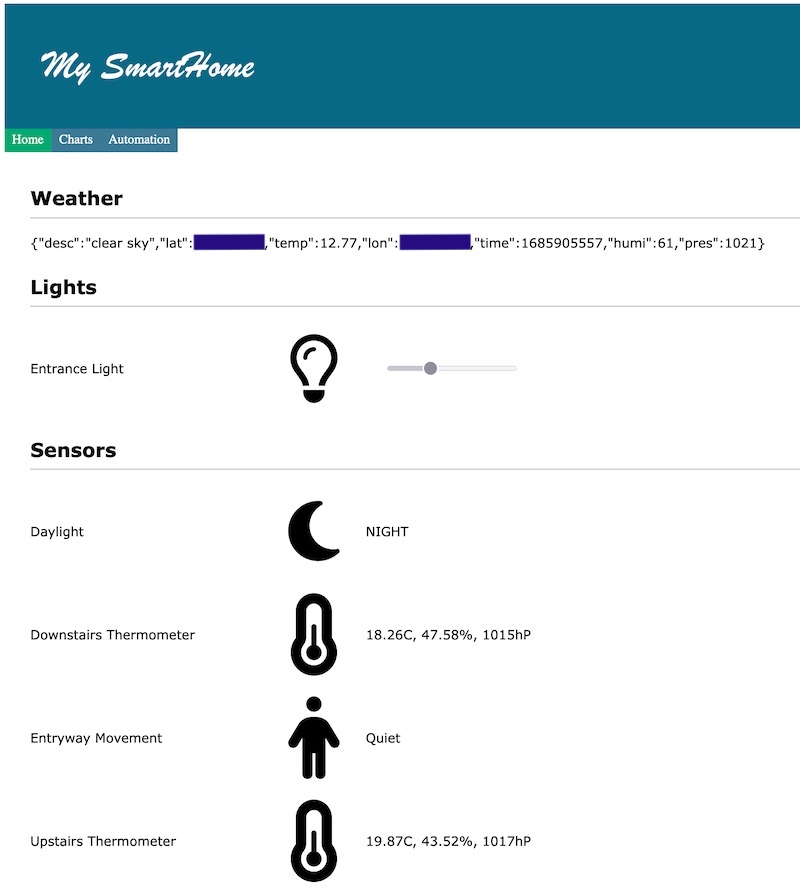
Notice that I haven’t made the Weather section ready yet so it just shows some JSON data for now!
I did add some charts (based on the charts.js library) which load data from a SQLite database which is populated by running Lua timers in the background which collect information from all sensors as well as weather data from the OpenWeather API:

The code to persist data into SQLite is pretty simple:
local db = {}

local sql = luasql.sqlite()

function db.withConnection(f)
    local con = sql:connect('smarthome.db')
    local ok, err = pcall(function() f(con) end)
    if not ok then trace("problem running SQL operation", err) end
    con:close()
end

db.withConnection(function(con)

  assert(con:execute [[
  CREATE TABLE IF NOT EXISTS Temperature (
    time    INTEGER UNIQUE NOT NULL,
    value   REAL    NOT NULL,
    name    TEXT    NOT NULL,
    UNIQUE(time, name)
  )
  ]])

  -- ...
end)
And so on for a few more tables to hold data for indoors humidity, pressure, local weather…
I was very happy with the results.
Conclusion
Adding a little automation to my home was not nearly easy as I had thought. I spent several months doing research before even buying my first device. There’s just so much information, ways to do things, competing protocols, countless vendors all trying to get you into their walled gardens to extract as much revenue from you as possible…
It’s a really challenging area. Despite all that, I did find a setup that I am happy with and hope that by describing my journey here, others can benefit and find at least some useful ideas for what to do and not to do in their own smart home setups.
There’s a lot of thing still missing… for example, I wanted to create a little DSL for writing small automation scripts that can control my things automatically, which shouldn’t be too hard now that all the requirements for that are in place.
Also, I haven’t moved all my things to the Raspbee controller… one reason being that I haven’t made it possible yet to control it using voice (doing that will probably require me to write my own integration with Google Nest). Another reason is that the Wifi devices normally don’t offer an API I can talk to from my Mako Server, so those devices will probably never become fully integrated. However, even if the setup is not perfect, it’s pretty close to where I wanted it to be.
All the code I am using in my smart home (and most of the code shown in this blog post) can be found on GitHub at renatoathaydes/mako-smarthome!
For anyone looking for a hobby that lets them use their programming skills while doing something pretty cool that the family can actually appreciate, I highly recommend going down this rabbit hole! Have fun!